Wednesday 22 August 2012

How to make urban 40k bases.

When I think of urban bases I imagine piles or rubble with detritus everywhere, and in that is the major problem: finding a balance between detail, ease of creation, finding a place for the models feet in all the rubble and cost. Whilst there are some great resin bases they are quite expensive and so for a lot of people the only option left are either:

a) boring bases
b)make them your self.

Now there is already some great tutorials out there but none of them really fill my most important criteria of "piles of rubble," so I thought I'd make my own. I actually got a bit lucky as I found the right ratios first time around  so saved my self a bit of time with trial and error, but on with the tutorial!

Materials:

  •  Some Plaster of Paris (I got a 1kg bag that's never going to run out for a measly $5)
  • Fine Sand (preferably have some coarse sand available to)
  • Water
  • Cheap brush and plastic spoon (unless you want to cover your eating cutlery with sand)
  • PVA Glue (also known as white glue)
  • Pieces of chopped up spruce (pieces from your bits box can also come in handy)
  • Disposable plastic plate (included as something to mix on and also not to wreck my pallet)

Method:

  •  Before starting you need to prepare the base, for this I'd recommend using a knife to cross hatch lines into the base to give the glue a chance of attaching. (note. I also applied this straight onto plain sand glued down with PVA and this worked well)
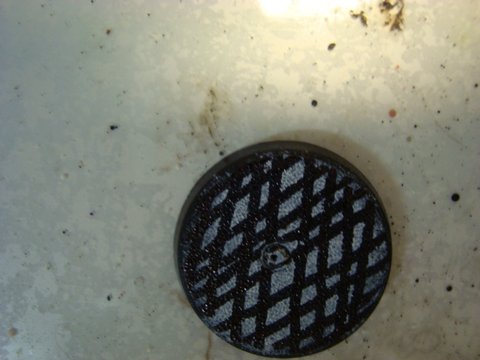
Black lines being where you would cut.

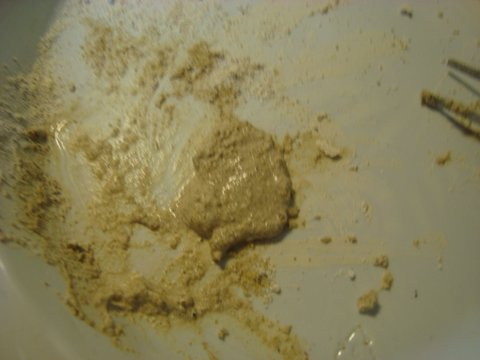
  • For a flying bases worth I used a about a spoon's worth of plaster combined with about half a spoon of sand. To this I added some water mixed with PVA and a couple of drops of pure PVA.

  • When this was the consistency of whipped cream I slathered it on to the base. Then I pushed in little rocks, and pieces of rubble, sprinkled some coarse sand on and the covered any gaps with more fine sand.


If you end up making to much you can smooth it out on a plate, wait for it  to dry and then break it up and uses it as rocks next time.
  • When this was dry I selectively added some more sand to places (this was to help rocks and the like to blend in) and then I painted on a mixture of glue and water. 
  • After this is painting and application of static grass, a step I have admittedly not gone up to yet.
 Besides the last step your now done, what do you think?

A couple I did up earlier (sorry just had to include the line)

And with models.


Sunday 19 August 2012

Halbarad 2 and some urban Eldar bases

Got some more work done on Halbarad this week, namely the metal and the muted green as well as getting started on the boots and banner. For the metal I tried doing a True Metallic Metal technique for the first time and whilst not perfect by any means I still pretty pleased with how it turned out. For the muted green I followed the Games Workshop tutorial for painting an Ork's head from the Lizardmen White Dwarf (2009 I think it was).


After picking up some plaster last week and my little basing experiment with this model I was keen to try my hand at doing some more interesting basing, (because along with sculpting this is my weakest area)> Anyway I did two flying bases up today for my eldar using my new technique, I also have a tutorial in the pipeline so check back midweek if you're interested.

Just a little teaser.

Monday 13 August 2012

Halbarad W.I.P.

After taking a short break from painting in the past few weeks from painting, i got going again on the weekend, to make good progress on the Halbarad model that has been sitting on my desk for the last year and a half. So far only the face is pretty much done and I'm really happy with that, especially the lips, not the best in the photo but in real life the red glazing I applied really makes them look good. Otherwise I'm also trying true metallic metal for the first time, something I want to do to my whole High Elf army as I think it looks great but I'll see how that goes. The models is still in the early stages obviously so any comments or criticisms will be greatly appreciated.